Differences Between CKEditor 4 and 5
CKEditor is the content editor used for the "Body" field on this site. It was upgraded from version 4 to version 5 on Fri 1 Dec 2023. This page documents the most important differences. If you run into any problems, please contact IT support.
More Accurate Styling
The content styles you see in the editor are now much closer to what is displayed when you save the page. For example:
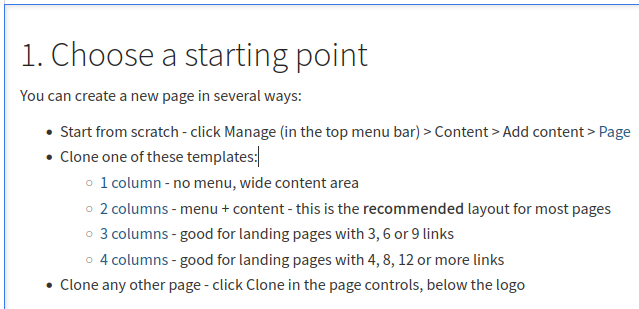
Simplified Dialogs
Some of the modal dialogs (e.g. Edit Link, Edit Image) have been replaced with popups that display within the editor:
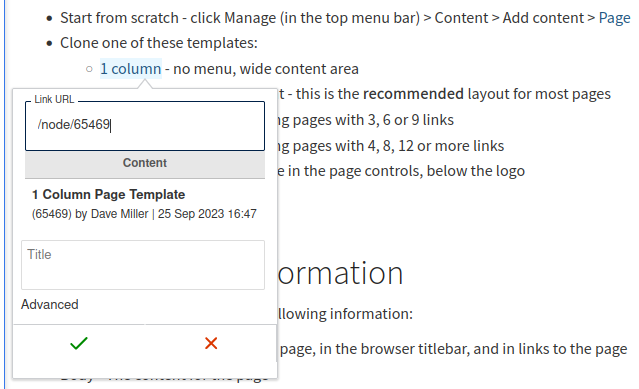
Advanced Styles
There are also some more advanced styles you can select from the new "Styles" dropdown, such as striped tables:

If there are any styles you would like to see added, please contact IT support.
YouTube Button Removed
The "Embed YouTube Video" button is no longer available. To embed a video in CKEditor 5:
- Click "Insert Media"
- Paste the video URL into the address field at the top (you may need to scroll up a little)
- Click "Add"
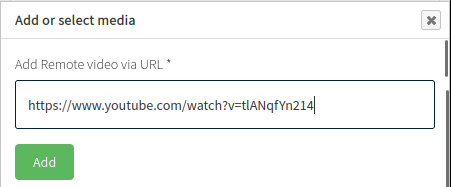
This will insert the video at the default size (800×450, 16:9). If you need more control, you can type this shortcode directly into the content area instead:
[youtube:ID|WIDTH|HEIGHT|TITLE]
For example:
[youtube:tlANqfYn214|640|480|Laying of the Penrose Paving]
Vimeo and Panopto are also supported.
File Insert Button Removed
Update: The "Insert" button was re-added on 18 Apr 2024, now the module has been updated to support CKEditor 5. The following alternatives are still available as well:
The "Insert" button in the "Files" list is no longer available. You can either upload the file directly using the "Insert File" button - the same as in CKEditor 4:
- Click the "Insert file" icon in the toolbar
- Click "Browse"
- Navigate to the file and open it
- Click "Save"
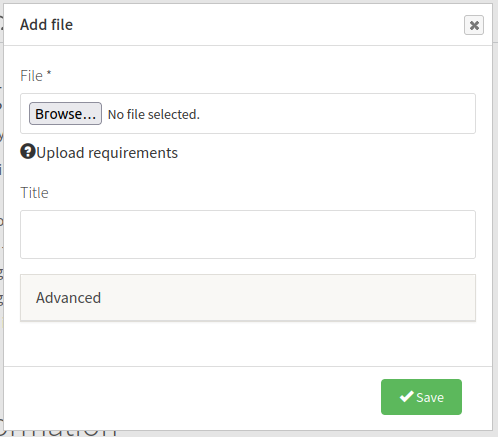
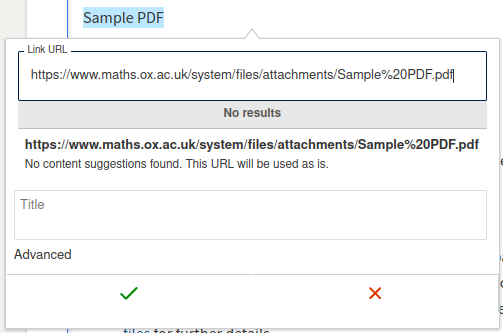
Or, if you have already uploaded the file to the "Files" section, you can manually copy the filename and paste it into a link:
- Right-click the filename in the "Files" list
- Click "Copy Link"
- In the editor, click the "Link" icon in the toolbar
- Paste the URL (Ctrl+V, or right-click > Paste)
- Click "Save" (the tick icon)
File Type Icons
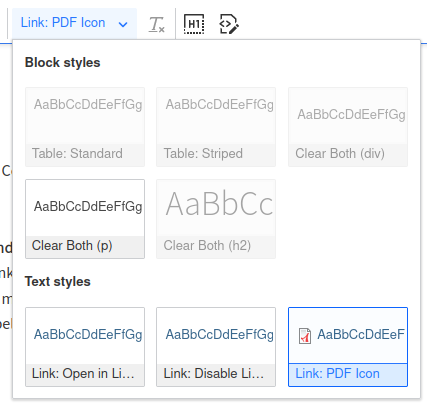
In either case, if you want to apply a PDF icon to the link (for consistency with existing links):
- Make sure the link is focused in the editor (it will have a light blue background)
- Click the "Styles" dropdown
- Click "Link: PDF Icon"
If you need any other file type icons adding to the list, please contact IT support.

