Setting Up Multi-Factor Authentication (MFA)
The university has enabled compulsory MFA (Multi-Factor Authentication) for its SSO services. Here is an OxCERT video on why MFA is needed.
We recommend setting up multiple MFA methods, in case you find yourself in circumstances where one method does not work (e.g. lost/broken mobile phone). We would normally recommend that you set up the Microsoft Authenticator app on your smartphone, plus another method which does not depend on the same device.
For Microsoft Authenticator setup instructions, please see the IT Services article How to use multi-factor authentication.
Two free cross-platform third party apps you could use on Linux are Authenticator for Chrome/Firefox/Edge, which is a really simple browser plugin, or KeePassXC, which is a full featured password manager that can be integrated with browsers, mobile phones, etc. We have provided instructions for setting up KeePassXC below.
Setting up MFA with KeePassXC
KeePassXC is an open-source, local-first password manager that is pre-installed on departmental desktops/laptops. This guide walks you through installing KeePassXC, setting up a secure database, integrating it with Firefox for autofill, adding username/password entries, and configuring MFA.
Create a new database (vault)
- Open KeePassXC → Database → New Database...
- Choose a secure location to save the .kdbx file (your home folder or /scratch).
- Set a strong Master Password — treat this like the single strongest secret you hold.
- The other default settings are good enough. Finish and save the database.
Create entries (username & password)
- In your open database, choose the group to create the entry in (e.g., Oxford → Maths).
- Click Add New Entry (plus icon).
- Fill the Title, Username, Password, and URL fields. (for example, for SSO logins the URL can be
https://login.microsoftonline.com) - You may add additional URLs (other websites where you use your SSO) in Browser Integration section (this option is not shown until you enable browser integration in next section of this guide).
- Save the entry.
Browser integration: KeePassXC-Browser + Firefox
Install the Firefox extension
- Open Firefox and go to Add-ons and Themes.
- Search for KeePassXC-Browser and install it (official extension provided by KeePassXC project).
Enable Browser Integration in KeePassXC
- In KeePassXC, go to Tools → Settings → Browser Integration.
- Enable Enable browser integration.
- Check the box for Firefox (and any other browsers you want to integrate).
- Click OK.
Pairing KeePassXC with Firefox (pairing workflow)
- In Firefox, click the KeePassXC extension icon. It will show a message saying it needs to be paired.
- Click connect/pair in the extension and allow the KeePassXC's pop-up with a descriptive note
Using fill / auto-fill
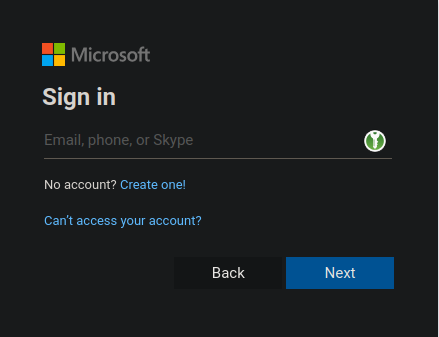
When you're on a website that matches an entry’s URL, KeePassXC automatically recognises the login fields. Simply click the green KeePassXC icon (shown below) to fill in your credentials instantly. (Same for the password field.)

Adding and using MFA (TOTP) for entries
Storing a TOTP secret
- Right-click an entry, then go to TOTP → Setup TOTP...
- If the website provides a QR code, look for an option such as “Can’t scan the QR code” or a similar link.
- The website will then provide a Secret Key, which you should copy and paste into the Secret Key field in KeePassXC.
- Click OK.
Generating codes in KeePassXC
You have several ways to obtain the code and enter it on the website.
- Right-click the entry → TOTP → Show TOTP
- Right-click the entry → TOTP → Copy TOTP
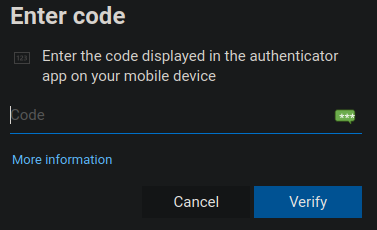
- KeePassXC-Browser automatically detects OTP code fields (as shown below), allowing you to simply click the green KeePassXC icon to have it auto-fill the code for you.


