Setting Up Multi-Factor Authentication (MFA)
This page describes how to set up MFA for your Maths IT account. For information about setting up MFA on your SSO account, please see Your Oxford SSO Account.
From September 2026, the department will require MFA for all Maths IT accounts. (Here is an OxCERT video on why MFA is needed.)
Setting up MFA
We strongly recommend setting up more than one MFA method, in case you find yourself in a situation where one method does not work - e.g. lost/broken mobile phone. We normally recommend that you set up the Microsoft Authenticator app on your smartphone, plus another method which does not depend on the same device.
You will be prompted to set up MFA when you first activate or log into your Maths IT account on the web. Alternatively, go to https://account.maths.ox.ac.uk/mfa. You will be asked to enter your Maths IT password for verification.

You can then choose which method to add:
- Authenticator app: An app on your phone/tablet/computer displays a code that changes every 30 seconds, which you must enter to log in. Recommended as your primary method to ensure you can log in on any device.
- Passkey: Uses your device's built-in security chip, a phone connected via Bluetooth, or a security key connected via USB/NFC. Allows you to log in with a PIN or fingerprint/face scan instead of your password – more convenient and more secure, but not available on all devices.
There are various ways you can set these up, depending on your preference - see below for our suggested options. If you need help with this, please contact the IT support team.
Authenticator App - Microsoft Authenticator (recommended)
Microsoft Authenticator for Android/iOS our the recommended primary MFA method, because most people use it for their SSO account already and because it will allow you to log in on any device.
To set it up:
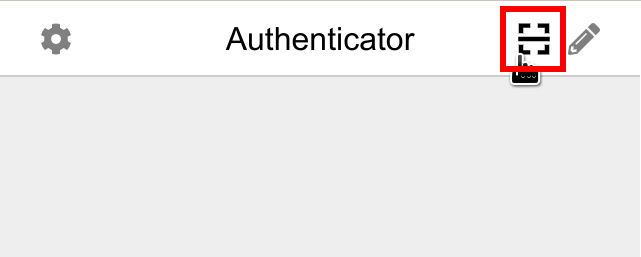
- Install Microsoft Authenticator from your mobile device's app store and open it
- Press the "Scan QR code" button
- On the MFA page, click "Authenticator app"
- Point your camera at the QR code shown on screen to add the account
- Tap on the account (it will be named "Mathematical Institute" and show your username)
- Enter the 6-digit code displayed on your phone for verification
- Click "Continue"
- Enter a name to identify your MFA method, e.g. "Microsoft Authenticator on my phone"
- Click "Finish Setup"
If you are not able to scan the QR code for any reason, tap "Enter code manually" then enter the account name (e.g. "Mathematical Institute - bloggsj") and the secret key displayed on screen.
When you log into your Maths IT account on the web, you will be prompted to enter an MFA code:
- Open the Microsoft Authenticator app
- Tap on the account
- Enter the 6-digit code displayed on your phone
- Click "Submit code"
Note: Unfortunately, Microsoft don't allow us to use the push notification method that you may be used to when logging into your SSO account - only the 6-digit code method is supported.
Authenticator App - Google/Other Authenticator
Google Authenticator and other standard (TOTP) Authenticator apps are also supported. Although we cannot provide detailed instructions for each app, the steps will be fairly similar:
To set it up:
- On the MFA page, click "Authenticator app"
- In your authenticator app, press the "Scan QR code" or "Add" button
- Point your camera at the QR code shown on screen to add the account
- Enter the 6-digit code displayed on your phone for verification
- Click "Continue"
- Enter a name to identify your MFA method, e.g. "Google Authenticator on my phone"
- Click "Finish Setup"
If you are not able to scan the QR code for any reason, you may be able to manually enter the secret key and settings displayed on screen instead. The way to do this varies by app - e.g. "Enter a setup key" or "Enter code manually".
When you log into your Maths IT account on the web, you will be prompted to enter an MFA code:
- Open your authenticator app
- Tap on the account
- Enter the 6-digit code displayed on your phone
- Click "Submit code"
Authenticator App - KeePassXC
KeePassXC is an open source, local-first password manager that is pre-installed on departmental desktops/laptops. You can use it to save passwords and MFA codes, all encrypted with a master password known only by you.
First, you need to create a password database:
- Open KeePassXC
- Click "Create Database"
- Enter a database name, e.g. "My Passwords"
- Accept the default encryption settings - click "Continue"
- Set a strong Master Password to encrypt your database
- Click "Done"
- Choose somewhere within your home directory to save the database
Each time you launch KeePassXC, it will prompt for your master password to unlock the database. (If not, click "Open Database" and select the database you created earlier.)
Next, create an entry in the database:
 Click "New Entry"
- Fill in the following:
- Title: Mathematical Institute
- Username: e.g.
bloggsj - Password: Your Maths password (optional)
- URL:
https://account.maths.ox.ac.uk
- Click "OK"
Now you can set up MFA:
- Right-click the "Mathematical Institute" entry you just created
- Click "TOTP" then "Set up TOTP"
- On the MFA page, click "Authenticator app"
- Click the secret key (below the QR code) to select it
- Copy it to the clipboard - e.g. press Ctrl-C on Windows/Linux, or Option-C on macOS
- Go back to KeePassXC and paste the secret key into the box - e.g. press Ctrl-V on Windows/Linux, or Option-V on macOS
- Click "OK" to save it
- Right-click the "Mathematical Institute" entry again
- Click "TOTP" then "Copy TOTP"

- Go back to the MFA setup page and paste the code into the box - e.g. press Ctrl-V on Windows/Linux, or Option-V on macOS
- Click "Continue"
- Enter a name to identify your MFA method, e.g. "KeePassXC on Maths desktop"
- Click "Finish Setup"
When you are prompted to enter your authenticator code when logging in:
- Right-click the "Mathematical Institute" entry
- Click "TOTP" then "Copy TOTP"
- Paste the code into the MFA code box - e.g. press Ctrl-V on Windows/Linux, or Option-V on macOS
- Click "Submit code"
KeePassXC-Browser Integration
Alternatively, to streamline this, there is an official browser extension you can use.
Initial setup:
- In KeePassXC, go to Tools → Settings → Browser Integration
- Tick "Enable browser integration"
- Tick the browser(s) that you want to use it with
- Click "OK"
- Install the browser extension/add-on for your browser (Chrome/Edge/Firefox)
- Click the "KeePassXC-Browser" icon (it may be hidden in the "Extensions" menu by default)
- Click "Connect"
- Enter a name to identify the browser, e.g. "Edge on Maths desktop"
- Click "Save and allow access"
Your browser now has access to your KeePassXC database.
When you log in, you should see the KeePassXC icon next to each field (username, password, code) - simply click it to fill in that field automatically:

If the icon doesn't appear automatically, click the KeePassXC icon in the toolbar then "Redetect login fields". Alternatively, right-click the field, go to the "KeePassXC-Browser" submenu, then select "Fill in Username/Password/TOTP", as appropriate. There are also keyboard shortcuts available - see KeePassXC → Settings → Keyboard shortcuts for details.
Authenticator App - Authenticator Extension for Chrome/Edge/Firefox
Authenticator Extension is a simple, open source browser extension that allows you to set up MFA on your desktop/laptop, without needing a phone.
To set it up:
- Install it in your browser
- Click the "Extensions" icon, find the "Authenticator" extension and pin it to the toolbar to make it easier to access (optional)
- Click the "Authenticator" extension icon
- Click the "Settings" icon
- Click "Security"
- Enter and confirm a password to encrypt your MFA secrets, then click "OK"
Then to use it with your Maths account:
- On the MFA page, click "Authenticator app"
- Click the "Authenticator" extension icon
- Click the "Scan QR code" icon:
- Click and drag to select the Microsoft QR code with your mouse
- Click "OK" to confirm it has been added
- Click "Next"
- Click the "Authenticator" extension icon again
- Click the 6-digit code to copy it to the clipboard (it will be labelled with "Microsoft" and your SSO username)
- If prompted, click "Allow" to allow the extension to copy the code to the clipboard (you should only need to do this once)
- Paste the code into the box - e.g. press Ctrl-V on Windows/Linux, or Option-V on macOS
- Click "Next" to complete the process
When you are prompted to enter your authenticator code when logging in:
- Click the "Authenticator" extension icon
- Click the 6-digit code to copy it to the clipboard
- Paste the code into the box - press Ctrl-V on Windows/Linux, or Option-V on macOS
- Click "Verify"
Passkey - Windows Laptop
Microsoft Windows has built-in support for passkeys, which can be used on departmental laptops and other personal computers.
Note: Windows Passkeys are not supported on departmental desktops or inside RAP at the current time.
First, you need to enable Windows Hello:
- Click the "Start" icon
- Click the "Settings" icon
- Click "Accounts"
- Click "Sign-in options"
- Click "PIN (Windows Hello)"
- Click the "Set up" button
- Follow the prompts to set up a PIN
Now you can create a passkey:
- On the MFA page, click "Passkey"
- When Windows prompts to "Save your passkey", click "Continue"
- Enter your PIN for confirmation
- Enter a name to identify your MFA method, e.g. "Maths laptop"
- Click "Finish Setup"
When you need to log in with your Maths account on that device:
- Click the "Log in with a passkey" button (no need to enter your username or password)
- Enter your PIN when prompted
Your PIN is never shared with us - it is only used by Windows to verify your identity. Please note that Windows passkeys cannot be transferred between devices.
Passkey - Mobile Phone
A passkey stored on your phone can be used to log into your Maths account on your phone or another device that supports Bluetooth passkeys.
Note: You cannot currently use a mobile phone passkey on a departmental desktop or inside RAP because they don't support Bluetooth. Please make sure you set up at least one other MFA method.
To register a passkey on your phone:
- Open the MFA page on your phone and enter your password
- Click "Passkey"
- Follow the prompts to register the passkey
- Enter a name to identify your MFA method, e.g. "Passkey on mobile phone"
- Click "Finish Setup"
When you need to log into your Maths account on your phone:
- Click the "Log in with a passkey" button (no need to enter your username or password)
- Follow the prompts to complete login
To use your phone's passkey to log into a laptop or other device via Bluetooth:
- Click the "Log in with a passkey" button (no need to enter your username or password)
- Click "iPhone, iPad, or Android device" (or similar option)
- Open the Camera app on your phone and scan the QR code
- Tap "Use passkey to sign in" (or similar option)
- Follow the prompts on your phone to complete login
Passkey - Hardware Security Key
If you have a hardware security key, such as a YubiKey, you can use it as a passkey to simplify the login process.
Note: While a security key can easily be transferred between devices, it cannot be used inside RAP. Please make sure you set up at least one other MFA method.
The exact steps vary depending on the device and browser you are using, but are typically as follows:
- On the MFA page, click "Passkey"
- If prompted, select the security key type
- Connect your security key via USB, or hold it against your phone's NFC reader
- Enter the PIN you have set for your security key (see the documentation that came with it if you are unsure how to set one)
- Press/touch the button on your security key to confirm
- Enter a name to identify your MFA method, e.g. "YubiKey"
- Click "Finish Setup"
When you need to log in with your Maths account on the web:
- Click the "Log in with a passkey" button (no need to enter your username or password)
- If prompted, select the security key type
- Connect your security key via USB, or hold it against your phone's NFC reader
- Enter the PIN you have set for your security key
Please note that hardware security keys cannot be used inside RAP, so we recommend also setting up an authenticator app.
Your PIN is never shared with us - it is only used by the security key to verify your identity.
Passkey - KeePassXC
KeePassXC is an open source, local-first password manager that is pre-installed on departmental desktops/laptops. You can use it with the KeePassXC-Browser extension to save passkeys, encrypted with a master password known only by you.
Note: A passkey stored in KeePassXC can only be used in the local browser. Please make sure you set up at least one other MFA method to allow you to log in on other devices, e.g. a phone, tablet or laptop. However, you can copy the KeePass database between devices, or keep them in sync with OneDrive or NextCloud.
First, you need to create a password database (if you haven't already):
- Open KeePassXC
- Click "Create Database"
- Enter a database name, e.g. "My Passwords"
- Accept the default encryption settings - click "Continue"
- Set a strong Master Password to encrypt your database
- Click "Done"
- Choose somewhere within your home directory to save the database
Each time you launch KeePassXC, it will prompt for your master password to unlock the database. (If not, click "Open Database" and select the database you created earlier.)
You also need to set up the browser integration (again, if you haven't already):
- In KeePassXC, go to Tools → Settings → Browser Integration
- Tick "Enable browser integration"
- Tick the browser(s) that you want to use it with
- Click "OK"
- Install the browser extension/add-on for your browser (Chrome/Edge/Firefox)
- Click the "KeePassXC-Browser" icon (it may be hidden in the "Extensions" menu by default)
- Click "Connect"
- Enter a name to identify the browser, e.g. "Edge on Maths desktop"
- Click "Save and allow access"
Your browser now has access to your KeePassXC database.
Next, enable Passkey support in the browser extension:
- Click the "KeePassXC-Browser" icon in your browser
- Click the "Settings" icon
- Scroll down to the "Passkeys" section
- Enable passkeys
Now you are ready to create a passkey:
- On the MFA page, click "Passkey"
- KeePassXC should prompt you to register a passkey - click "Register":

- Enter a name to identify your MFA method, e.g. "KeePassXC Passkey on Maths desktop"
- Click "Finish Setup"
When you need to log in with your Maths account in that browser:
- Make sure KeePassXC is running and unlocked
- Click the "Log in with a passkey" button (no need to enter your username or password)
- Click "Authenticate"

Tip: If you want to stay logged in, tick "Stay logged in" before clicking "Log in with a passkey".
Troubleshooting
If you get the error "Invalid MFA code" when logging in with an authenticator app, please check that the clock on your mobile phone is precisely correct. This is how it knows which 6-digit code to display, so if the time is wrong by more than 30 seconds, you will not be able to log in. (Most phones will set the time automatically, so this is rarely a problem.)
If you need further assistance, please contact the IT support team.
Lost MFA Methods
If you are still signed into your account:
- Go to https://account.maths.ox.ac.uk/mfa
- Enter your password for verification
- Delete the lost MFA method
- Set up a replacement method if needed (see above)
If not but you have a working backup MFA method:
- Go to https://account.maths.ox.ac.uk/mfa
- Log in with your backup MFA method
- Enter your Maths password again for verification
- Delete the lost MFA method
- Set up a replacement method if needed (see above)
Alternatively, if you are still able to log into your SSO account:
- Go to https://account.maths.ox.ac.uk/mfa
- Log in with your Maths username and password
- Click "Lost your MFA?"
- Click "Authenticate with SSO"
- Log into your SSO account to verify your identity and complete the login process
- Enter your Maths password again for verification
- Delete the lost MFA method
- Set up a replacement method if needed (see above)
If you are not able to do any of the above, visit the Maths IT support team with your official government ID. Once your ID has been verified, all of your existing MFA methods will be removed. You can then log in and set up new MFA methods from scratch (see above).