Your Oxford SSO Account
What is SSO Used For?
Your university SSO account (usually in the format abcd1234@OX.AC.UK) is used to log into:
- Nexus365 email (Outlook)
- Course Materials Hub (Moodle)
- Various other websites/applications across the university
It is separate from your Maths IT account, Remote Access account, etc. Please see the IT Information for New Users page for more details of the different accounts.
SSO Account Activation
Your SSO account is created when you apply for a university card. The activation instructions are usually sent to your personal email address.
If you do not receive them, they expire before you use them, or your forget your login details after creating them:
- Staff: Ask the HR team to resend them, or visit the Maths IT team with your official government ID
- Visitors: Ask the visitors coordinator to resend them, or visit the Maths IT team with your official government ID
- Students: Contact your college IT support team
Changing Your Password
Go to https://webauth.ox.ac.uk/password to change your SSO password. (This will not affect your Maths password or other accounts.)
Set a Security Question
Go to https://webauth.ox.ac.uk/security_question to set a security question that you can use to reset your SSO password if you should forget it in the future.
Forgotten Password / Security Question
If you have forgotten both your password and your security question/answer:
- Staff and visitors: Visit the Maths IT team with your official government ID
- Undergraduate students: Contact your college IT support team
- Postgraduate students: Either contact your college IT support team or visit the Maths IT team with your official government ID
Once your ID has been verified, you will be provided with a rescue code that you can use to set a new security question and then reset your password.
Multi-Factor Authentication (MFA)
The university requires MFA for all SSO accounts. (Here is an OxCERT video on why MFA is needed.)
We strongly recommend setting up more than one MFA method, in case you find yourself in a situation where one method does not work - e.g. lost/broken mobile phone. We normally recommend that you set up the Microsoft Authenticator app on your smartphone, plus another method which does not depend on the same device.
You will be prompted to set up MFA when you first log into your SSO account. Alternatively, go to https://mysignins.microsoft.com/security-info and log in using your SSO username (e.g. abcd1234@ox.ac.uk).

You can then click "Add sign-in method" and choose which method to add. The methods we recommend are documented below, though Microsoft may offer other methods. If you need help with this, please contact the IT team.
Microsoft Authenticator (recommended)
Microsoft Authenticator for Android/iOS is the recommended primary MFA method, because it is tightly integrated with the Microsoft login process. It supports push notifications, if you are online, as well as traditional 6-digit codes.
For setup instructions, please see the central university How to use multi-factor authentication page (click "How to set up MFA").
Google/Other Authenticator
Google Authenticator and other standard authenticator (TOTP) apps can also be used if you prefer. Please see the central university How to use multi-factor authentication page (click "How to set up MFA" then scroll to "Alternative authenticator").
KeePassXC
KeePassXC is an open source, local-first password manager that is pre-installed on departmental desktops/laptops. You can use it to save passwords and MFA codes, all encrypted with a master password known only by you.
First, you need to create a password database:
- Open KeePassXC
- Click "Create Database"
- Enter a database name, e.g. "My Passwords"
- Accept the default encryption settings - click "Continue"
- Set a strong Master Password to encrypt your database
- Click "Done"
- Choose somewhere within your home directory to save the database
Each time you launch KeePassXC, it will prompt for your master password to unlock the database. (If not, click "Open Database" and select the database you created earlier.)
Next, create an entry in the database:
 Click "New Entry"
- Fill in the following:
- Title: Oxford SSO
- Username: e.g.
abcd1234@ox.ac.uk - Password: Your SSO password (optional)
- URL:
https://login.microsoftonline.com
- Click "OK"
Now you can set up MFA:
- Right-click the "Oxford SSO" entry you just created
- Click "TOTP" then "Set up TOTP"
- In the Microsoft "Add a sign-in method" window (see above), select "Microsoft Authenticator"
- Click "Set up a different authentication app", then "Next"
- Click "Can't scan the QR code?"
- Click "Copy key"
- Go back to KeePassXC and paste the secret key into the box - e.g. press Ctrl-V on Windows/Linux, or Option-V on macOS
- Click "OK" to save it
- Right-click the "Oxford SSO" entry again
- Click "TOTP" then "Copy TOTP"

- Go back to the Microsoft setup page and click "Next"
- Paste the code into the box - e.g. press Ctrl-V on Windows/Linux, or Option-V on macOS
- Click "Next" to complete the process
When you are prompted to enter your authenticator code when logging in:
- Right-click the "Oxford SSO" entry
- Click "TOTP" then "Copy TOTP"
- Paste the code into the box - e.g. press Ctrl-V on Windows/Linux, or Option-V on macOS
- Click "Verify"
KeePassXC-Browser Integration
Alternatively, to streamline this, there is an official browser extension you can use.
Initial setup:
- In KeePassXC, go to Tools → Settings → Browser Integration
- Tick "Enable browser integration"
- Tick the browser(s) that you want to use it with
- Click "OK"
- Install the browser extension/add-on for your browser (Chrome/Edge/Firefox)
- Click the "KeePassXC-Browser" icon (it may be hidden in the "Extensions" menu by default)
- Click "Connect"
- Enter a name to identify the browser, e.g. "Edge on Maths desktop"
- Click "Save and allow access"
Your browser now has access to your KeePassXC database.
Next time you log in, you should see the KeePassXC icon next to each field (username, password, code) - simply click it to fill in that field automatically:

If the icon doesn't appear automatically, click the KeePassXC icon in the toolbar then "Redetect login fields". Alternatively, right-click the field, go to the "KeePassXC-Browser" submenu, then select "Fill in Username/Password/TOTP", as appropriate. There are also keyboard shortcuts available - see KeePassXC → Settings → Keyboard shortcuts for details.
Authenticator Extension for Chrome/Edge/Firefox
Authenticator Extension is a simple, open source browser extension that allows you to set up MFA on your desktop/laptop, without needing a phone.
To set it up:
- Install it in your browser
- Click the "Extensions" icon, find the "Authenticator" extension and pin it to the toolbar to make it easier to access (optional)
- Click the "Authenticator" extension icon
- Click the "Settings" icon
- Click "Security"
- Enter and confirm a password to encrypt your MFA secrets, then click "OK"
Then to use it with your SSO account:
- In the Microsoft "Add a sign-in method" window (see above), select "Microsoft Authenticator"
- Click "Set up a different authentication app", then "Next"
- Click the "Authenticator" extension icon
- Click the "Scan QR code" icon:
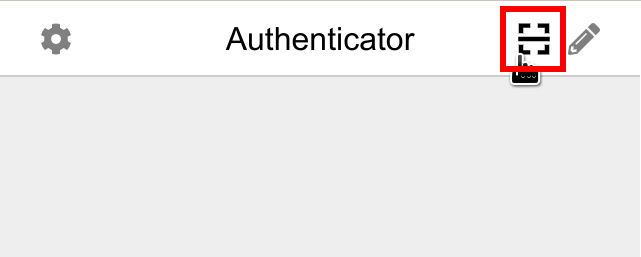
- Click and drag to select the Microsoft QR code with your mouse
- Click "OK" to confirm it has been added
- Click "Next"
- Click the "Authenticator" extension icon again
- Click the 6-digit code to copy it to the clipboard (it will be labelled with "Microsoft" and your SSO username)
- If prompted, click "Allow" to allow the extension to copy the code to the clipboard (you should only need to do this once)
- Paste the code into the box - e.g. press Ctrl-V on Windows/Linux, or Option-V on macOS
- Click "Next" to complete the process
When you are prompted to enter your authenticator code when logging in:
- Click the "Authenticator" extension icon
- Click the 6-digit code to copy it to the clipboard
- Paste the code into the box - e.g. press Ctrl-V on Windows/Linux, or Option-V on macOS
- Click "Verify"
Hardware Security Key
If you have a hardware security key, such as a YubiKey, please see the central university How to use multi-factor authentication page (click "How to set up MFA" then scroll to "Security key").
Phone/SMS
Phone/SMS verification is no longer recommended, and is being phased out, because it is less secure than other available methods. It is not available to accounts created since 12 Aug 2025.
Lost MFA Methods
If you have a working backup MFA method, go to https://mysignins.microsoft.com/security-info, log in using the backup MFA method, then delete the lost MFA method. You can then set up a replacement method if needed (see above) to ensure you have at least two.
If you no longer have any working MFA methods:
- Staff and visitors: Visit the Maths IT team with your official government ID
- Undergraduate students: Contact your college IT support team
- Postgraduate students: Either contact your college IT support team or visit the Maths IT team with your official government ID
Once your ID has been verified, all of your existing MFA methods will be removed and you will be required to set up new ones (see above).