Connecting Android to Zimbra
To connect your Android phone to the departmental Zimbra system, please follow the following guide. Whilst there are different flavours of Android, the setup in recent versions (Android 4.0 and higher) should be more or less the same.
The screenshots below show the setup for Android 4.0 devices. Note: Clicking the screenshots below will enlarge them.
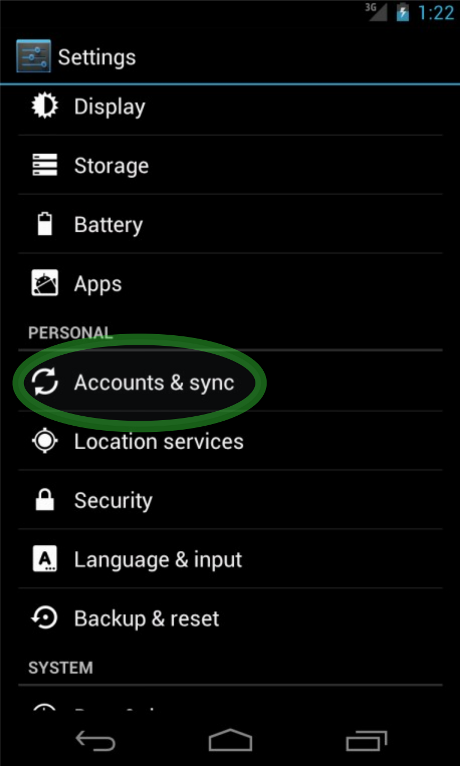
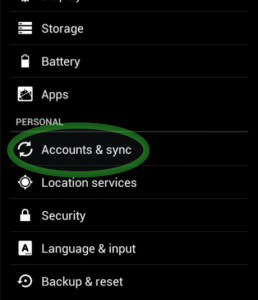
- Go to "System Settings"
- Click on "Accounts & sync"
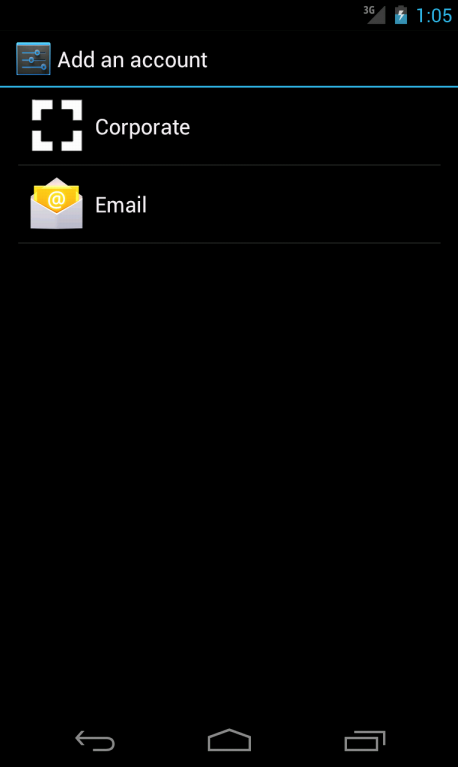
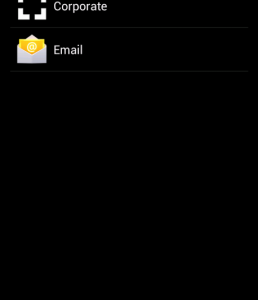
- Click on "Add Account" at the bottom.
- Click on "Corporate", i.e.
(You can click the screenshot above to enlarge)
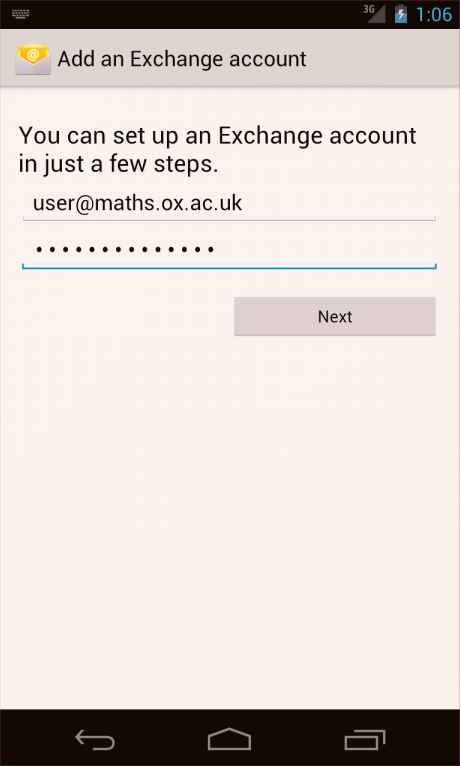
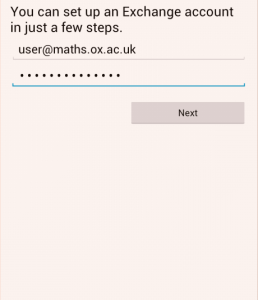
- Fill in the details for your account, and click "Next". e.g.
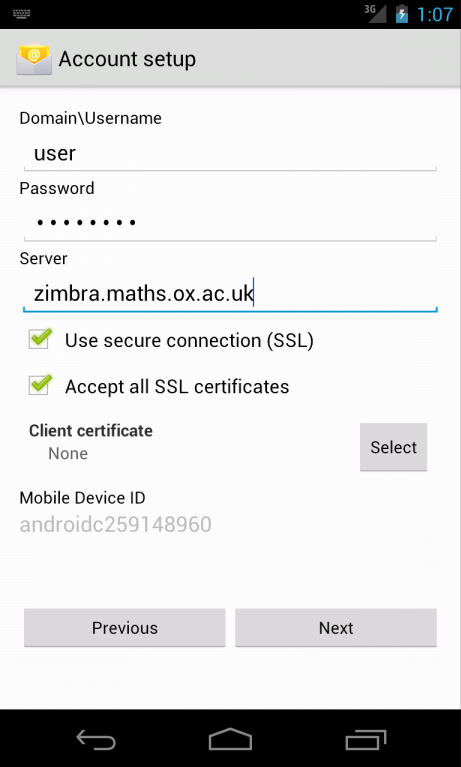
- Change "Domain\Username" to simply your username, change the Server to "zimbra.maths.ox.ac.uk" and finally check the "Accept all SSL certificates", e.g.
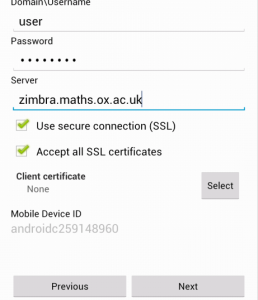
and click "Next"
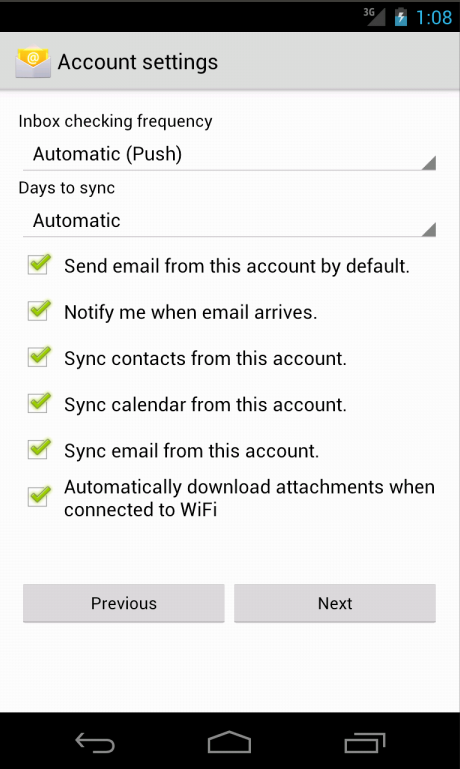
- The device should then begin to check the incoming server settings. At the next screen, you may want to:
* Examine the "Inbox checking frequency" dropdown. Set to "Automatic (Push)" will ensure your device will receive the e-mail as soon as it arrives, however this may reduce the time between battery recharges.
* You may also wish to alter how many days should be synchronised with this device. Remember: The more days you select, the more memory will needed to store the messages.
* Finally, you may wish to use send e-mail from this account by default - if this is the case, check the option, e.g.
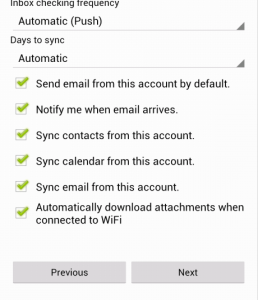
When you're happy with your settings, click "Next".
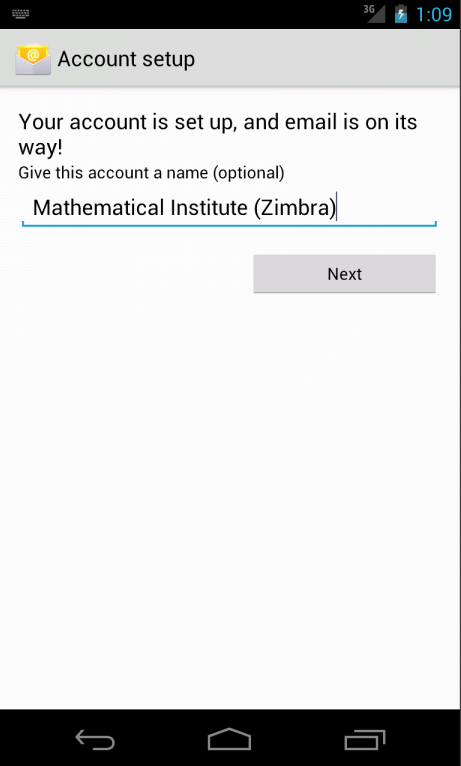
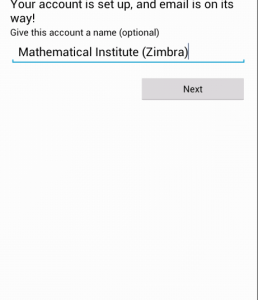
- Now your e-mail should begin to arrive on your device. Before you finish, you're given the option to rename the account. We have done so in our example, i.e.
- Congratulations. Your e-mail should now be arriving on your device and can be accessed by using the E-mail app.