Outlook and CalDAV
Zimbra uses CalDAV to share/synchronise it's calendars between other applications. Unfortunately, Outlook does not natively support CalDAV, so if you wish to use your Zimbra calendar within Outlook and are not using one of the managed Windows machines inside the department, you may find your calendars are not synchronising. This page gives instruction on how to configure the Outlook CalDAV plugin for Outlook.
Configuring the Outlook CalDav Synchronizer
- Download and install the FOSS plugin from https://sourceforge.net/projects/outlookcaldavsynchronizer/
- Start Outlook with your preconfigured mail profile previously configured using the remote access to e-mail instructions.
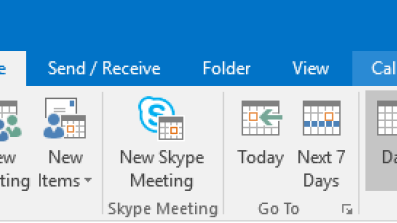
- If you wish to have the synchronisation going to a different calendar, rather than the default, create it now.
- If you wish to have the synchronisation going to a different calendar, rather than the default, create it now.
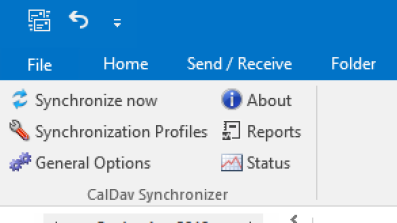
- Select the new tab that has appeared named "CalDav Synchronizer" (Click the image to resize)

- Click the option named "Synchronisation Profiles".

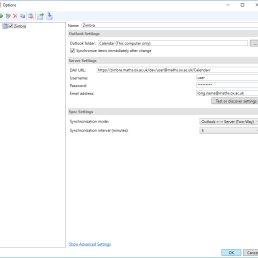
- Click the green Plus (+) button to add a new Sychronisation profile and using the illustration below, customise it to your needs. (Click the image to enlarge it)

In this case, we are using a profile for a user with username "user"- Name: Zimbra - The profile name
- Outlook folder: Select the calendar you with to synchronise. By default, Outlook creates a single calendar, however if you created another calendar in step 2a, then select it here.
- The "Synchronize items immediately after change" checkbox means that the changes are pushed upstream to Zimbra as soon as they're added/removed from within Outlook.
- The DAV URL is the location of the server and is of the form:
https://<server>/dav/<user>@<domain>/<calendar>
where server is zimbra.maths.ox.ac.uk, domain is maths.ox.ac.uk, user is your username and calendar is the name of your calendar you wish to synchronise, "Calendar" by default. - Username and Password are the ones you log into the zimbra server with and Email address is the long version of your e-mail <firstname>.<lastname>@maths.ox.ac.uk.
- At this point you can click "Test or discover settings" to see if you've entered everything correctly. If not, double check the settings.
- Synchronisation mode is normally two-way for complete synchronisation, but there are other options if you wish.
- Synchronisation interval is how often the calendar will synchronise automatically

